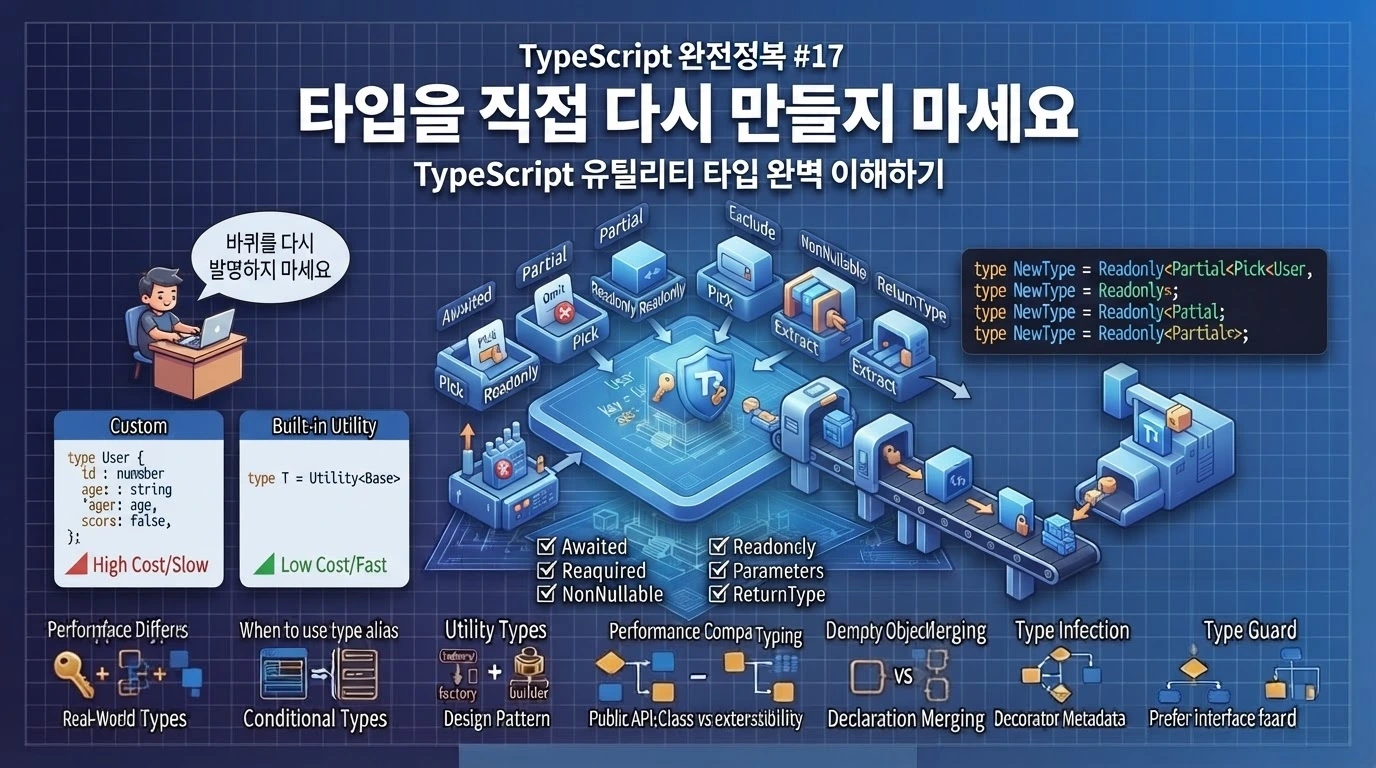
목차
TypeScript 유틸리티 타입 완벽 이해하기
지난 시간에는 객체 타입을 뜯고 다시 조립하는 방법을 배웠습니다.
특정 속성의 타입을 꺼낼 수도 있었고,
type UserName =
  User["name"];
모든 키를 순회하면서 새로운 타입을 만들 수도 있었습니다.
type Optional<T> = {
  [K in keyof T]?:
    T[K];
};
모든 속성을 읽기 전용으로 바꾸기도 했습니다.
type Locked<T> = {
  readonly [K in keyof T]:
    T[K];
};
필요한 속성만 뽑아내는 타입도 직접 만들었습니다.
type MyPick<
  T,
  K extends keyof T
> = {
  [P in K]:
    T[P];
};
여기까지 오면 이런 생각이 듭니다.
“TypeScript 개발자들이 이런 타입을 매번 직접 만들어 쓰는 건가?”
다행히 아닙니다.
TypeScript는 자주 사용하는 타입 변환을 이미 만들어 두었습니다.
Partial<T>
Required<T>
Readonly<T>
Pick<T, K>
Omit<T, K>
Record<K, V>
Exclude<T, U>
Extract<T, U>
NonNullable<T>
ReturnType<T>
Parameters<T>
이런 타입들을 유틸리티 타입(Utility Type)이라고 합니다.
쉽게 말하면 TypeScript가 기본 제공하는 타입 공구 세트입니다. 🧰
지금까지 우리는 나사를 돌리기 위해 직접 드라이버를 깎고 있었습니다.
이번 편부터는 공구함을 열겠습니다.
1. 이번 시간에 배울 내용
이번 시간에는 다음 내용을 알아봅니다.
- 유틸리티 타입이란 무엇인가?
- `Partial<T>`
- `Required<T>`
- `Readonly<T>`
- `Pick<T, K>`
- `Omit<T, K>`
- `Record<K, V>`
- `Exclude<T, U>`
- `Extract<T, U>`
- `NonNullable<T>`
- `ReturnType<T>`
- `Parameters<T>`
- `ConstructorParameters<T>`
- `InstanceType<T>`
- `Awaited<T>`
- 문자열 유틸리티 타입
- 여러 유틸리티 타입 조합하기
- 생성 DTO와 수정 DTO 설계하기
- API 응답 타입 재사용하기
- 유틸리티 타입을 과도하게 중첩했을 때의 문제
- 실무에서 어떤 유틸리티 타입을 선택해야 하는가?
오늘의 핵심 문장은 다음과 같습니다.
이미 있는 타입을 복사해서 다시 만들지 말고, 필요한 부분만 변환해서 재사용하자.
2. 유틸리티 타입이란?
다음 사용자 타입이 있습니다.
interface User {
  id: number;
  name: string;
  email: string;
  password: string;
  isActive: boolean;
}
사용자 수정 화면에서는 모든 속성이 필요하지 않습니다.
이름만 변경할 수도 있습니다.
{
  name: "새 이름"
}
이메일만 변경할 수도 있습니다.
{
  email: "new@example.com"
}
그렇다고 별도의 타입을 다시 작성하면 어떨까요?
interface UpdateUser {
  id?: number;
  name?: string;
  email?: string;
  password?: string;
  isActive?: boolean;
}
`User`와 거의 똑같은 구조를 또 작성했습니다.
이제 `User`에 속성이 추가되면 `UpdateUser`도 수정해야 합니다.
복사본이 하나 생긴 순간부터 유지보수의 작은 괴물이 부화합니다. 🥚
유틸리티 타입을 사용하면 간단합니다.
type UpdateUser =
  Partial<User>;
끝입니다.
3. `Partial<T>`란?
`Partial<T>`는 객체 타입의 모든 속성을 선택적 속성으로 변경합니다.
원본:
interface User {
  id: number;
  name: string;
  email: string;
}
적용:
type PartialUser =
  Partial<User>;
결과는 다음과 비슷합니다.
type PartialUser = {
  id?: number;
  name?: string;
  email?: string;
};
이제 일부 속성만 작성할 수 있습니다.
const firstUpdate:
  PartialUser = {
  name: "김제네릭",
};
const secondUpdate:
PartialUser = {
email:
"new@example.com",
};빈 객체도 허용됩니다.
const emptyUpdate:
  PartialUser = {};
4. `Partial<T>`는 어떻게 만들어졌을까?
지난 시간에 배운 매핑된 타입으로 비슷하게 만들 수 있습니다.
type MyPartial<T> = {
  [K in keyof T]?:
    T[K];
};
하나씩 읽어보겠습니다.
keyof T
→ T의 모든 키

K in keyof T
→ 키를 하나씩 순회

T[K]
→ 해당 키의 원래 값 타입

?
→ 선택적 속성으로 변경
즉,
Partial<User>는 TypeScript가 미리 만들어둔 타입 변환 도구입니다.
마법이 아니라 조립식 기계입니다.
5. `Partial<T>`가 가장 많이 쓰이는 곳
대표적인 사용처는 수정 요청입니다.
interface User {
  id: number;
  name: string;
  email: string;
  isActive: boolean;
}
사용자 수정 함수를 만들어 보겠습니다.
function updateUser(
  user: User,
  changes: Partial<User>
): User {
  return {
    ...user,
    ...changes,
  };
}
사용합니다.
const user: User = {
  id: 1,
  name: "김타입",
  email: "type@example.com",
  isActive: true,
};
const updatedUser =
updateUser(
user,
{
name: "이컴파일",
}
);전체 객체를 다시 전달할 필요가 없습니다.
6. 하지만 `Partial<User>`가 항상 좋은 것은 아니다
다음 타입을 다시 보겠습니다.
interface User {
  id: number;
  name: string;
  email: string;
  isActive: boolean;
}
사용자 수정 API에 `Partial<User>`를 그대로 사용하면 `id`까지 수정할 수 있습니다.
const changes:
  Partial<User> = {
  id: 999,
};
업무 규칙상 ID 변경이 금지되어 있다면 너무 넓은 타입입니다.
이럴 때 다른 유틸리티 타입과 조합합니다.
type UpdateUserInput =
  Partial<
    Pick<
      User,
      "name"
      | "email"
      | "isActive"
    >
  >;
이제 수정 가능한 속성만 선택적으로 받을 수 있습니다.
유틸리티 타입도 공구입니다.
망치가 있다고 모든 것을 망치로 두드리면 안 됩니다. 🔨
7. `Required<T>`란?
`Required<T>`는 반대로 모든 선택적 속성을 필수 속성으로 변경합니다.
다음 설정 타입을 보겠습니다.
interface AppConfig {
  apiUrl?: string;
  timeout?: number;
  debug?: boolean;
}
초기 설정에서는 일부 값이 없어도 될 수 있습니다.
const config:
  AppConfig = {
  debug: true,
};
하지만 설정 로딩이 끝난 후에는 모든 값이 반드시 존재해야 한다고 가정해 보겠습니다.
type CompleteConfig =
  Required<AppConfig>;
결과:
type CompleteConfig = {
  apiUrl: string;
  timeout: number;
  debug: boolean;
};
이제 모든 속성이 필요합니다.
const completeConfig:
  CompleteConfig = {
  apiUrl:
    "https://api.example.com",
  timeout: 3000,
  debug: false,
};
8. `Required<T>`의 원리
비슷한 타입을 직접 작성하면 다음과 같습니다.
type MyRequired<T> = {
  [K in keyof T]-?:
    T[K];
};
여기서 핵심은 `-?`입니다.
?
→ 선택적 속성

-?
→ 선택적 표시 제거
즉,
nickname?: string이
nickname: string으로 바뀝니다.
TypeScript가 모든 속성 문 앞에 붙어 있던 “선택 사항” 스티커를 떼어냅니다.
9. `Partial`과 `Required` 비교
원본:
interface Profile {
  name: string;
  nickname?: string;
  imageUrl?: string;
}
`Partial`:
type EditableProfile =
  Partial<Profile>;
결과:
{
  name?: string;
  nickname?: string;
  imageUrl?: string;
}
`Required`:
type CompleteProfile =
  Required<Profile>;
결과:
{
  name: string;
  nickname: string;
  imageUrl: string;
}
정리하면:
Partial<T>
→ 전부 선택 사항

Required<T>
→ 전부 필수 사항
10. `Readonly<T>`란?
`Readonly<T>`는 객체의 모든 속성을 읽기 전용으로 만듭니다.
interface User {
  id: number;
  name: string;
  email: string;
}
type ReadonlyUser =
Readonly<User>;결과:
type ReadonlyUser = {
readonly id: number;
readonly name: string;
readonly email: string;
};객체를 생성합니다.
const user:
ReadonlyUser = {
id: 1,
name: "김타입",
email:
"type@example.com",
};읽기는 가능합니다.
console.log(user.name);수정은 불가능합니다.
user.name =
"이컴파일";오류가 발생합니다.
11. `Readonly<T>`의 원리
비슷한 타입을 직접 작성하면 다음과 같습니다.
type MyReadonly<T> = {
readonly [K in keyof T]:
T[K];
};모든 키를 순회하면서 `readonly`를 붙입니다.
id
→ readonly id
name
→ readonly name
email
→ readonly email전 직원의 책상 서랍에 한 번에 자물쇠를 달아주는 타입입니다. 🔒
12. `readonly`와 `Readonly<T>`의 차이
특정 속성 하나만 읽기 전용으로 만들 수 있습니다.
interface User {
readonly id: number;
name: string;
email: string;
}반면 `Readonly<T>`는 모든 속성을 바꿉니다.
type ReadonlyUser =
Readonly<User>;readonly
→ 특정 속성에 직접 작성
Readonly<T>
→ 타입 전체에 일괄 적용13. `Readonly<T>`도 깊은 읽기 전용은 아니다
다음 타입을 살펴보겠습니다.
interface User {
id: number;
profile: {
nickname: string;
};
}type ReadonlyUser =
Readonly<User>;`profile` 자체를 다른 객체로 교체할 수는 없습니다.
user.profile = {
nickname: "새닉네임",
};하지만 내부 속성은 변경할 수 있습니다.
user.profile.nickname =
"새닉네임";왜냐하면 기본 `Readonly<T>`는 얕은 변환이기 때문입니다.
중첩 객체 내부까지 자동으로 모두 `readonly`로 만들지는 않습니다.
14. `Pick<T, K>`란?
`Pick<T, K>`는 기존 객체 타입에서 원하는 속성만 선택합니다.
다음 사용자 타입이 있습니다.
interface User {
id: number;
name: string;
email: string;
password: string;
isActive: boolean;
}목록 화면에는 ID와 이름만 필요하다고 가정하겠습니다.
type UserListItem =
Pick<
User,
"id" | "name"
>;결과:
type UserListItem = {
id: number;
name: string;
};사용:
const userItem:
UserListItem = {
id: 1,
name: "김타입",
};15. `Pick`은 타입 복사를 줄여준다
`Pick`이 없다면 다음처럼 작성할 수 있습니다.
interface UserListItem {
id: number;
name: string;
}문제는 원본 `User.id`가 변경되었을 때입니다.
interface User {
id: string;
name: string;
// ...
}별도로 만든 `UserListItem`에는 여전히:
id: number;가 남아 있을 수 있습니다.
`Pick`을 사용하면 원본과 연결됩니다.
type UserListItem =
Pick<
User,
"id" | "name"
>;원본이 바뀌면 파생 타입도 따라갑니다.
16. `Pick`의 원리
간단하게 구현하면 다음과 비슷합니다.
type MyPick<
T,
K extends keyof T
> = {
[P in K]:
T[P];
};핵심은 두 부분입니다.
K extends keyof T선택할 키는 반드시 `T`에 존재해야 합니다.
그리고:
[P in K]선택된 키만 순회합니다.
잘못된 키는 사용할 수 없습니다.
type Wrong =
Pick<
User,
"banana"
>;바나나는 여전히 사용자 속성이 아닙니다. 🍌
17. `Omit<T, K>`란?
`Omit<T, K>`는 반대로 특정 속성을 제외합니다.
전체 사용자 타입:
interface User {
id: number;
name: string;
email: string;
password: string;
isActive: boolean;
}외부에 사용자 정보를 응답할 때 비밀번호를 제외하고 싶습니다.
type PublicUser =
Omit<
User,
"password"
>;결과:
type PublicUser = {
id: number;
name: string;
email: string;
isActive: boolean;
};18. 여러 속성 제외하기
여러 속성을 한 번에 제거할 수도 있습니다.
type UserSummary =
Omit<
User,
"password"
| "email"
>;결과:
type UserSummary = {
id: number;
name: string;
isActive: boolean;
};`Pick`과 `Omit`은 방향이 반대입니다.
Pick
→ 필요한 것만 챙긴다.
Omit
→ 필요 없는 것만 뺀다.여행 가방을 쌀 때와 비슷합니다.
`Pick`은 “여권과 지갑만 넣자.”
`Omit`은 “다 넣되 전기밥솥은 빼자.” 🧳
19. `Pick`과 `Omit` 중 무엇을 사용할까?
다음 타입이 있습니다.
interface User {
id: number;
name: string;
email: string;
password: string;
role: string;
isActive: boolean;
createdAt: string;
}화면에서 `id`와 `name`만 필요합니다.
이 경우:
Pick<
User,
"id" | "name"
>이 명확합니다.
반대로 전체 사용자에서 `password` 하나만 빼면 된다면:
Omit<
User,
"password"
>가 간결합니다.
선택 기준:
필요한 속성이 적다
→ Pick
제외할 속성이 적다
→ Omit20. `Record<K, V>` 복습
지난 시간에도 배웠던 `Record`입니다.
type Role =
| "admin"
| "manager"
| "user";각 역할의 표시 이름을 만들겠습니다.
type RoleLabels =
Record<
Role,
string
>;const roleLabels:
RoleLabels = {
admin: "관리자",
manager: "매니저",
user: "일반 사용자",
};모든 키가 필요합니다.
const roleLabels:
RoleLabels = {
admin: "관리자",
user: "일반 사용자",
};`manager`가 없으므로 오류입니다.
21. `Record`의 원리
개념적으로 다음과 비슷합니다.
type MyRecord<
K extends PropertyKey,
V
> = {
[P in K]: V;
};키 목록을 하나씩 순회하면서 같은 값 타입을 부여합니다.
admin
→ string
manager
→ string
user
→ string`Record`는 키와 값 관계를 만드는 매핑 전문 공구입니다.
22. `Record`를 권한표에 활용하기
역할을 정의합니다.
type UserRole =
| "admin"
| "manager"
| "user";권한을 정의합니다.
type Permission =
| "read"
| "write"
| "delete";각 역할별 권한을 관리해 보겠습니다.
type PermissionSet =
Record<
Permission,
boolean
>;type RolePermissions =
Record<
UserRole,
PermissionSet
>;const permissions:
RolePermissions = {
admin: {
read: true,
write: true,
delete: true,
},
manager: {
read: true,
write: true,
delete: false,
},
user: {
read: true,
write: false,
delete: false,
},
};새 역할이나 권한을 추가하면 누락된 설정을 TypeScript가 알려줍니다.
23. 여기까지는 객체 타입 변환 공구
지금까지 살펴본 유틸리티 타입은 주로 객체 구조를 변환했습니다.
Partial
→ 모두 선택적
Required
→ 모두 필수
Readonly
→ 모두 읽기 전용
Pick
→ 일부 선택
Omit
→ 일부 제외
Record
→ 키와 값을 매핑이제부터는 유니언 타입을 다루는 공구를 만나보겠습니다.
공구함 두 번째 서랍을 엽니다. 🧰
24. `Exclude<T, U>`란?
`Exclude<T, U>`는 유니언 타입 `T`에서 `U`에 해당하는 타입을 제거합니다.
상태 타입이 있습니다.
type RequestStatus =
| "idle"
| "loading"
| "success"
| "error";`idle`을 제외하고 싶습니다.
type WorkingStatus =
Exclude<
RequestStatus,
"idle"
>;결과:
type WorkingStatus =
| "loading"
| "success"
| "error";이름 그대로:
Exclude
→ 제외하다입니다.
25. 여러 타입 제외하기
두 상태를 제거할 수도 있습니다.
type ActiveStatus =
Exclude<
RequestStatus,
"idle"
| "success"
>;결과:
"loading" | "error"문자열뿐 아니라 다른 유니언 타입에서도 사용할 수 있습니다.
type Value =
string
| number
| boolean
| null;type PrimitiveValue =
Exclude<
Value,
null
>;결과:
string
| number
| boolean26. `Exclude`의 개념적 원리
`Exclude`는 조건부 타입과 연결되어 있습니다.
개념적으로 다음과 비슷하게 생각할 수 있습니다.
type MyExclude<T, U> =
T extends U
? never
: T;유니언 타입의 각 멤버를 하나씩 검사합니다.
"idle" extends "idle"
→ true
→ never
→ 제거
"loading" extends "idle"
→ false
→ 유지
"success"
→ 유지
"error"
→ 유지여기서 `never`가 다시 등장합니다.
10편에서 배운 “도달할 수 없는 타입”이 이번에는 유니언에서 멤버를 지우는 지우개 역할을 합니다.
27. `Extract<T, U>`란?
`Extract<T, U>`는 반대로 `T`에서 `U`와 호환되는 타입만 남깁니다.
type RequestStatus =
| "idle"
| "loading"
| "success"
| "error";완료 상태만 가져오겠습니다.
type FinalStatus =
Extract<
RequestStatus,
"success" | "error"
>;결과:
"success" | "error"`Exclude`와 방향이 반대입니다.
Exclude
→ 이것들을 빼라.
Extract
→ 이것들만 남겨라.28. `Extract`의 개념적 원리
개념적으로 다음과 비슷합니다.
type MyExtract<T, U> =
T extends U
? T
: never;하나씩 검사합니다.
"idle"
→ 원하는 목록에 없음
→ never
"loading"
→ 없음
→ never
"success"
→ 있음
→ 유지
"error"
→ 있음
→ 유지결과:
"success" | "error"공항 보안검색대처럼 허용된 멤버만 통과시킵니다. 🛂
29. `Exclude`와 `Extract` 비교
원본:
type Status =
| "idle"
| "loading"
| "success"
| "error";제외:
type A =
Exclude<
Status,
"idle"
>;결과:
"loading"
| "success"
| "error"추출:
type B =
Extract<
Status,
"success" | "error"
>;결과:
"success" | "error"기억법:
Exclude
→ 퇴장 명단
Extract
→ 입장 명단30. `NonNullable<T>`란?
다음 타입이 있습니다.
type UserName =
string
| null
| undefined;`null`과 `undefined`를 제거하고 싶습니다.
type SafeUserName =
NonNullable<
UserName
>;결과:
string`NonNullable<T>`는 `null`과 `undefined`를 제거합니다.
31. 여러 타입이 섞여 있어도 동작한다
type Value =
string
| number
| null
| undefined;type SafeValue =
NonNullable<Value>;결과:
string | number개념적으로 다음과 비슷합니다.
Exclude<
Value,
null | undefined
>32. `NonNullable` 실무 예제
사용자 프로필에서 이미지 주소가 없을 수 있습니다.
interface UserProfile {
imageUrl:
string
| null
| undefined;
}타입만 추출합니다.
type ImageUrl =
UserProfile["imageUrl"];결과:
string
| null
| undefined이미지 URL이 반드시 존재하는 상황의 타입을 만들 수 있습니다.
type ExistingImageUrl =
NonNullable<ImageUrl>;결과:
string다만 `NonNullable`은 실제 값을 검사하지 않습니다.
const value:
ImageUrl = null;타입 변환만 한다고 `value`가 문자열로 바뀌지는 않습니다.
런타임 검증은 별도로 필요합니다.
33. 객체 공구와 함수 공구를 만나보자
지금까지는 객체와 유니언 타입을 변환했습니다.
이번에는 함수입니다.
다음 함수를 보겠습니다.
function createUser(
id: number,
name: string
) {
return {
id,
name,
isActive: true,
};
}이 함수가 반환하는 타입을 직접 작성하지 않고 가져올 수 있을까요?
가능합니다.
ReturnType<T>를 사용합니다.
34. `ReturnType<T>`란?
함수 타입의 반환값 타입을 추출합니다.
function createUser(
id: number,
name: string
) {
return {
id,
name,
isActive: true,
};
}type User =
ReturnType<
typeof createUser
>;결과는 다음과 비슷합니다.
type User = {
id: number;
name: string;
isActive: boolean;
};함수 결과와 별도로 객체 타입을 다시 작성할 필요가 없습니다.
35. 왜 `typeof`가 같이 필요할까?
다음은 함수 값입니다.
createUser`ReturnType`은 함수 타입을 필요로 합니다.
따라서 타입 위치의 `typeof`를 사용합니다.
typeof createUser그다음:
ReturnType<
typeof createUser
>라고 작성합니다.
흐름은 다음과 같습니다.
createUser
↓ typeof
함수 타입
↓ ReturnType
반환값 타입지난 시간 배운 `typeof`가 여기서 다시 일을 시작합니다.
36. 화살표 함수에서도 `ReturnType`
const getProduct = () => {
return {
id: 1,
name: "키보드",
price: 120000,
};
};type Product =
ReturnType<
typeof getProduct
>;결과:
{
id: number;
name: string;
price: number;
}함수 선언 방식과 관계없이 함수 타입을 얻을 수 있다면 사용할 수 있습니다.
37. `ReturnType`이 유용한 상황
상태 관리 함수를 예로 들어보겠습니다.
function createInitialState() {
return {
users: [],
loading: false,
error: null,
};
}상태 타입을 직접 작성할 수도 있습니다.
interface State {
users: unknown[];
loading: boolean;
error: null;
}하지만 함수 결과를 기준으로 타입을 만들 수 있습니다.
type State =
ReturnType<
typeof createInitialState
>;실제 구현이 타입의 기준이 됩니다.
38. `Parameters<T>`란?
이번에는 함수의 매개변수 타입을 가져오겠습니다.
function createUser(
id: number,
name: string,
isAdmin: boolean
): void {
// ...
}type CreateUserParameters =
Parameters<
typeof createUser
>;결과는 튜플입니다.
[
id: number,
name: string,
isAdmin: boolean
]함수의 매개변수 목록을 하나의 튜플 타입으로 가져옵니다.
39. 특정 매개변수 타입 꺼내기
`Parameters<T>`는 튜플이므로 인덱스드 액세스 타입과 함께 사용할 수 있습니다.
type CreateUserParams =
Parameters<
typeof createUser
>;첫 번째 매개변수 타입:
type UserId =
CreateUserParams[0];결과:
number두 번째:
type UserName =
CreateUserParams[1];결과:
string세 번째:
type IsAdmin =
CreateUserParams[2];결과:
boolean16편에서 배운 인덱스드 액세스 타입과 깔끔하게 연결됩니다.
40. `Parameters` 실무 예제
기존 함수를 감싸는 로깅 함수를 만든다고 가정해 보겠습니다.
function sendEmail(
to: string,
subject: string,
body: string
): void {
console.log(
`${to}에게 메일 전송`
);
}같은 매개변수 구조를 재사용할 수 있습니다.
type SendEmailParams =
Parameters<
typeof sendEmail
>;function logEmail(
...args: SendEmailParams
): void {
console.log(
"메일 발송 준비",
args
);
}매개변수 타입을 다시 작성하지 않아도 됩니다.
41. `ReturnType`과 `Parameters` 비교
ReturnType<T>
→ 함수가 무엇을 반환하는가?
Parameters<T>
→ 함수가 무엇을 받는가?예:
function add(
a: number,
b: number
): number {
return a + b;
}type AddParameters =
Parameters<typeof add>;결과:
[number, number]type AddReturn =
ReturnType<typeof add>;결과:
number함수를 앞뒤로 엑스레이 촬영하는 셈입니다. 🩻
입구에는 무엇이 들어가고, 출구에는 무엇이 나오는지 확인합니다.
42. `ConstructorParameters<T>`란?
클래스 생성자의 매개변수 타입을 가져올 수도 있습니다.
class User {
constructor(
public id: number,
public name: string
) {}
}type UserConstructorParams =
ConstructorParameters<
typeof User
>;결과:
[number, string]클래스 생성자도 결국 입력값 목록을 가지고 있기 때문입니다.
43. `InstanceType<T>`란?
클래스 생성자로 만들어지는 인스턴스 타입을 가져옵니다.
class User {
constructor(
public id: number,
public name: string
) {}
}type UserInstance =
InstanceType<
typeof User
>;이 타입은 `new User()`로 만들어지는 인스턴스 타입입니다.
const user:
UserInstance =
new User(
1,
"김타입"
);클래스 회차에서 더 자세히 다루겠지만, 유틸리티 타입 공구함에는 클래스 전용 공구도 있다는 정도로 기억하면 충분합니다.
44. `Awaited<T>`란?
비동기 코드에서는 `Promise` 안의 최종 결과 타입이 필요할 수 있습니다.
type Result =
Promise<string>;`Awaited`를 사용합니다.
type Value =
Awaited<Result>;결과:
string`Promise`가 여러 겹이어도 최종 값을 풀어낼 수 있습니다.
type Nested =
Promise<
Promise<number>
>;type Value =
Awaited<Nested>;결과:
number택배 상자를 열었더니 또 상자가 나오고, 그 안의 상자까지 열어 최종 물건을 꺼내는 타입입니다. 📦📦📦
45. 비동기 함수와 `Awaited`
다음 함수가 있습니다.
async function fetchUser() {
return {
id: 1,
name: "김타입",
};
}함수 반환 타입부터 가져옵니다.
type FetchUserResult =
ReturnType<
typeof fetchUser
>;결과는:
Promise<{
id: number;
name: string;
}>실제 `await` 이후의 타입이 필요합니다.
type User =
Awaited<
FetchUserResult
>;결과:
{
id: number;
name: string;
}한 줄로 작성할 수도 있습니다.
type User =
Awaited<
ReturnType<
typeof fetchUser
>
>;46. 문자열에도 유틸리티 타입이 있다
TypeScript에는 문자열 리터럴 타입을 변환하는 유틸리티도 있습니다.
대표적으로:
Uppercase<T>
Lowercase<T>
Capitalize<T>
Uncapitalize<T>입니다.
47. `Uppercase<T>`
type HttpMethod =
"get"
| "post"
| "delete";type UpperHttpMethod =
Uppercase<
HttpMethod
>;결과:
"GET"
| "POST"
| "DELETE"문자열 리터럴 타입의 모든 문자를 대문자로 변환합니다.
48. `Lowercase<T>`
type HttpMethod =
"GET"
| "POST"
| "DELETE";type LowerHttpMethod =
Lowercase<
HttpMethod
>;결과:
"get"
| "post"
| "delete"49. `Capitalize<T>`
type Property =
"name"
| "email";type CapitalizedProperty =
Capitalize<Property>;결과:
"Name"
| "Email"첫 글자를 대문자로 변경합니다.
50. `Uncapitalize<T>`
type Property =
"Name"
| "Email";type LowerProperty =
Uncapitalize<Property>;결과:
"name"
| "email"첫 글자를 소문자로 바꿉니다.
51. 문자열 유틸리티와 템플릿 리터럴 타입
16편에서 Getter 타입을 만들었습니다.
interface User {
id: number;
name: string;
email: string;
}type Getters<T> = {
[
K in keyof T
as `get${Capitalize<
string & K
>}`
]:
() => T[K];
};결과:
type UserGetters = {
getId: () => number;
getName: () => string;
getEmail: () => string;
};`Capitalize` 같은 문자열 유틸리티는 템플릿 리터럴 타입과 함께 사용하면 강력합니다.
52. 유틸리티 타입을 조합할 수 있다
하나만 사용하는 것이 아닙니다.
다음 타입이 있습니다.
interface User {
readonly id: number;
name: string;
email: string;
password: string;
isActive: boolean;
createdAt: string;
}사용자 수정 타입을 만들어 보겠습니다.
수정 가능한 속성:
name
email
password
isActive먼저 필요한 속성만 고릅니다.
type EditableUser =
Pick<
User,
"name"
| "email"
| "password"
| "isActive"
>;모두 선택적으로 바꿉니다.
type UpdateUserInput =
Partial<
EditableUser
>;결과:
{
name?: string;
email?: string;
password?: string;
isActive?: boolean;
}53. `Partial<Pick<...>>` 한 번에 작성하기
분리하지 않고 작성할 수도 있습니다.
type UpdateUserInput =
Partial<
Pick<
User,
"name"
| "email"
| "password"
| "isActive"
>
>;동작 순서는 안쪽부터 읽습니다.
Pick
↓
수정 가능한 속성 선택
Partial
↓
선택한 속성을 모두 선택적으로 변경러시아 인형처럼 안쪽부터 하나씩 열면 됩니다. 🪆
54. `Partial<Omit<...>>` 방식도 가능하다
수정할 수 없는 속성이 적다면 `Omit`이 더 편할 수 있습니다.
type UpdateUserInput =
Partial<
Omit<
User,
"id"
| "createdAt"
>
>;의미:
User에서
id와 createdAt 제거
남은 속성을
모두 선택적으로 변경다만 이 경우 `password`나 다른 속성까지 수정 대상으로 포함되는 것이 업무 규칙에 맞는지 확인해야 합니다.
55. 생성 DTO 만들기
데이터베이스의 사용자 타입이 있습니다.
interface User {
id: number;
name: string;
email: string;
isActive: boolean;
createdAt: string;
}사용자 생성 요청에서는 다음 속성이 서버에서 자동 생성된다고 가정하겠습니다.
id
isActive
createdAt생성 입력 타입을 만들 수 있습니다.
type CreateUserInput =
Omit<
User,
"id"
| "isActive"
| "createdAt"
>;결과:
type CreateUserInput = {
name: string;
email: string;
};const input:
CreateUserInput = {
name: "김타입",
email:
"type@example.com",
};56. API 공개 응답 타입 만들기
사용자 객체에는 비밀번호가 있다고 가정하겠습니다.
interface User {
id: number;
name: string;
email: string;
password: string;
isActive: boolean;
}API 응답에서는 비밀번호를 제외해야 합니다.
type UserResponse =
Omit<
User,
"password"
>;function toUserResponse(
user: User
): UserResponse {
const {
password,
...safeUser
} = user;
return safeUser;
}여기서 매우 중요한 점이 있습니다.
`Omit`은 타입에서만 속성을 제거합니다.
실제 객체에서 비밀번호를 제거하려면 위 예제처럼 런타임 코드도 필요합니다.
타입 지우개가 데이터베이스 레코드까지 몰래 지워주지는 않습니다.
57. `Pick`도 실제 객체를 변환하지 않는다
다음 타입을 만들었다고 가정하겠습니다.
type UserSummary =
Pick<
User,
"id" | "name"
>;이 타입을 작성했다고 실제 객체에서 `email`, `password` 등이 삭제되는 것은 아닙니다.
유틸리티 타입은 타입 구조를 변환합니다.
실제 JavaScript 데이터 변환은 별도로 해야 합니다.
function toUserSummary(
user: User
): UserSummary {
return {
id: user.id,
name: user.name,
};
}이 구분은 매우 중요합니다.
Utility Type
→ TypeScript 타입 변환
JavaScript 코드
→ 실제 데이터 변환58. 실습 1: 회원 관리 타입 설계
원본 사용자 타입을 정의합니다.
interface User {
readonly id: number;
name: string;
email: string;
password: string;
role:
| "admin"
| "user";
isActive: boolean;
createdAt: string;
updatedAt: string;
}생성 타입:
type CreateUserInput =
Omit<
User,
"id"
| "isActive"
| "createdAt"
| "updatedAt"
>;수정 타입:
type UpdateUserInput =
Partial<
Pick<
User,
"name"
| "email"
| "password"
| "role"
| "isActive"
>
>;공개 응답 타입:
type PublicUser =
Omit<
User,
"password"
>;목록용 타입:
type UserListItem =
Pick<
User,
"id"
| "name"
| "role"
| "isActive"
>;원본 하나에서 네 종류의 타입이 만들어졌습니다.
59. 실습 2: 상품 관리 타입 설계
interface Product {
readonly id: number;
name: string;
description: string;
price: number;
stock: number;
status:
| "sale"
| "sold-out"
| "hidden";
createdAt: string;
updatedAt: string;
}상품 생성:
type CreateProductInput =
Omit<
Product,
"id"
| "createdAt"
| "updatedAt"
>;상품 수정:
type UpdateProductInput =
Partial<
Omit<
Product,
"id"
| "createdAt"
| "updatedAt"
>
>;상품 카드:
type ProductCard =
Pick<
Product,
"id"
| "name"
| "price"
| "status"
>;읽기 전용 API 응답:
type ProductResponse =
Readonly<Product>;60. 실습 3: 요청 상태 타입 정리
type RequestStatus =
| "idle"
| "loading"
| "success"
| "error"
| "cancelled";실제 요청이 진행 중이거나 종료된 상태만 가져오겠습니다.
type NonIdleStatus =
Exclude<
RequestStatus,
"idle"
>;완료 상태:
type FinishedStatus =
Extract<
RequestStatus,
"success"
| "error"
| "cancelled"
>;진행 상태:
type ProcessingStatus =
Extract<
RequestStatus,
"loading"
>;유니언 타입에서도 새로운 의미의 부분집합을 쉽게 만들 수 있습니다.
61. 실습 4: 비동기 함수 결과 타입 얻기
async function fetchProducts() {
return [
{
id: 1,
name: "키보드",
price: 120000,
},
{
id: 2,
name: "마우스",
price: 60000,
},
];
}함수 반환 타입:
type FetchProductsResult =
ReturnType<
typeof fetchProducts
>;결과:
Promise<{
id: number;
name: string;
price: number;
}[]>`await` 이후 타입:
type Products =
Awaited<
FetchProductsResult
>;상품 하나의 타입:
type Product =
Products[number];한 줄로도 가능합니다.
type Product =
Awaited<
ReturnType<
typeof fetchProducts
>
>[number];조금 길지만 흐름은 명확합니다.
함수
↓ ReturnType
Promise 배열
↓ Awaited
배열
↓ [number]
요소 하나62. 실습 5: 함수 래퍼 만들기
다음 함수가 있습니다.
function calculatePrice(
price: number,
quantity: number,
discountRate: number
): number {
const total =
price * quantity;
return (
total *
(1 - discountRate)
);
}매개변수 타입:
type PriceParams =
Parameters<
typeof calculatePrice
>;결과:
[
price: number,
quantity: number,
discountRate: number
]반환 타입:
type PriceResult =
ReturnType<
typeof calculatePrice
>;결과:
number로깅 래퍼를 만들 수 있습니다.
function calculateWithLog(
...args: PriceParams
): PriceResult {
console.log(
"계산 시작",
args
);
const result =
calculatePrice(
...args
);
console.log(
"계산 결과",
result
);
return result;
}원본 함수의 매개변수 타입이 바뀌면 래퍼도 자동으로 영향을 받습니다.
63. 자주 발생하는 실수
실수 1. 수정 타입을 원본과 따로 작성하기
interface User {
id: number;
name: string;
email: string;
}interface UpdateUser {
name?: string;
email?: string;
}의도적으로 독립된 타입이라면 괜찮지만 원본과 항상 동기화되어야 한다면 다음처럼 연결하는 편이 안전합니다.
type UpdateUser =
Partial<
Pick<
User,
"name" | "email"
>
>;실수 2. `Partial<User>`면 무조건 수정 DTO라고 생각하기
type UpdateUser =
Partial<User>;`id`, `createdAt` 등 수정하면 안 되는 속성까지 포함될 수 있습니다.
수정 가능한 속성을 먼저 제한합니다.
실수 3. `Readonly<T>`가 깊은 객체까지 모두 잠근다고 생각하기
type ReadonlyUser =
Readonly<User>;중첩 객체 내부는 여전히 수정될 수 있습니다.
깊은 읽기 전용이 필요하다면 별도 재귀 타입 설계가 필요합니다.
실수 4. `Pick`과 `Omit`이 실제 데이터를 바꾼다고 생각하기
type SafeUser =
Omit<
User,
"password"
>;비밀번호가 런타임 객체에서 자동으로 사라지는 것은 아닙니다.
실제 데이터 가공 코드를 작성해야 합니다.
실수 5. `Exclude`와 `Omit`을 혼동하기
`Exclude`는 유니언 타입의 멤버를 제거합니다.
Exclude<
Status,
"idle"
>`Omit`은 객체 속성을 제거합니다.
Omit<
User,
"password"
>이 둘은 이름이 비슷하지만 작업 대상이 다릅니다.
실수 6. `Extract`와 `Pick`을 혼동하기
`Extract`:
Extract<
Status,
"success" | "error"
>유니언 멤버를 고릅니다.
`Pick`:
Pick<
User,
"id" | "name"
>객체 속성을 고릅니다.
유니언 멤버
→ Extract
객체 속성
→ Pick실수 7. `NonNullable`이 런타임 null 검사를 해준다고 생각하기
type SafeName =
NonNullable<Name>;타입 변환일 뿐 실제 값 검사는 하지 않습니다.
실수 8. `ReturnType`에 함수 값을 직접 넣기
다음처럼 쓰는 것이 아닙니다.
type Result =
ReturnType<
createUser
>;`createUser`는 값입니다.
타입이 필요합니다.
type Result =
ReturnType<
typeof createUser
>;실수 9. 유틸리티 타입을 너무 깊게 중첩하기
type VeryHardType =
Readonly<
Partial<
Pick<
Omit<
User,
"password"
>,
"id"
| "name"
| "email"
>
>
>;작동하더라도 읽기가 어렵습니다.
분리합니다.
type SafeUser =
Omit<
User,
"password"
>;type UserSummary =
Pick<
SafeUser,
"id"
| "name"
| "email"
>;type OptionalUserSummary =
Partial<
UserSummary
>;type ReadonlyUserSummary =
Readonly<
OptionalUserSummary
>;타입도 독자가 읽는 코드입니다.
압축률보다 가독성이 중요합니다.
64. 유틸리티 타입 선택 공식
타입을 변환해야 할 때 다음 질문을 확인해 보세요.
모든 속성을 선택적으로 만들고 싶은가?
Partial<T>모든 속성을 필수로 만들고 싶은가?
Required<T>모든 속성을 수정하지 못하게 하고 싶은가?
Readonly<T>객체에서 필요한 속성만 가져오고 싶은가?
Pick<T, K>객체에서 몇 개 속성만 제거하고 싶은가?
Omit<T, K>정해진 키 집합에 동일한 값 타입을 연결하고 싶은가?
Record<K, V>유니언 타입에서 일부 멤버를 제거하고 싶은가?
Exclude<T, U>유니언 타입에서 원하는 멤버만 남기고 싶은가?
Extract<T, U>`null`, `undefined`를 제거하고 싶은가?
NonNullable<T>함수의 반환 타입이 필요한가?
ReturnType<T>함수의 매개변수 타입이 필요한가?
Parameters<T>Promise 내부의 최종 타입이 필요한가?
Awaited<T>65. 미니 퀴즈
문제 1
다음 타입은 어떻게 변할까요?
interface User {
id: number;
name: string;
}
type Result =
Partial<User>;정답
{
id?: number;
name?: string;
}문제 2
선택적 속성을 모두 필수로 만들려면?
interface Config {
apiUrl?: string;
timeout?: number;
}정답
type CompleteConfig =
Required<Config>;문제 3
`User`에서 `id`, `name`만 가져오려면?
정답
type UserSummary =
Pick<
User,
"id" | "name"
>;문제 4
`User`에서 `password`만 제거하려면?
정답
type SafeUser =
Omit<
User,
"password"
>;문제 5
다음 타입에서 `"idle"`만 제거하려면?
type Status =
| "idle"
| "loading"
| "success";정답
type ActiveStatus =
Exclude<
Status,
"idle"
>;결과:
"loading" | "success"문제 6
`"success"`와 `"error"`만 남기려면?
type Status =
| "idle"
| "loading"
| "success"
| "error";정답
type FinalStatus =
Extract<
Status,
"success"
| "error"
>;문제 7
다음 타입에서 `null`과 `undefined`를 제거하려면?
type Name =
string
| null
| undefined;정답
type SafeName =
NonNullable<Name>;결과:
string문제 8
함수 반환 타입을 추출하려면?
function getUser() {
return {
id: 1,
name: "김타입",
};
}정답
type User =
ReturnType<
typeof getUser
>;문제 9
함수 매개변수 목록을 타입으로 가져오려면?
정답
type Params =
Parameters<
typeof someFunction
>;문제 10
다음 비동기 함수의 `await` 이후 결과 타입을 얻어보세요.
async function getUser() {
return {
id: 1,
name: "김타입",
};
}정답
type User =
Awaited<
ReturnType<
typeof getUser
>
>;66. 핵심 정리
`Partial<T>`
모든 속성을 선택적으로 만듭니다.
type UpdateUser =
Partial<User>;`Required<T>`
모든 속성을 필수로 만듭니다.
type CompleteConfig =
Required<AppConfig>;`Readonly<T>`
모든 속성을 읽기 전용으로 만듭니다.
type LockedUser =
Readonly<User>;`Pick<T, K>`
필요한 속성만 선택합니다.
type UserSummary =
Pick<
User,
"id" | "name"
>;`Omit<T, K>`
일부 속성을 제외합니다.
type PublicUser =
Omit<
User,
"password"
>;`Record<K, V>`
키 집합에 값 타입을 연결합니다.
type RoleLabels =
Record<
Role,
string
>;`Exclude<T, U>`
유니언에서 일부 타입을 제거합니다.
type NonIdleStatus =
Exclude<
Status,
"idle"
>;`Extract<T, U>`
유니언에서 원하는 타입만 가져옵니다.
type FinalStatus =
Extract<
Status,
"success"
| "error"
>;`NonNullable<T>`
`null`과 `undefined`를 제거합니다.
type SafeName =
NonNullable<Name>;`ReturnType<T>`
함수 반환 타입을 가져옵니다.
type Result =
ReturnType<
typeof fn
>;`Parameters<T>`
함수 매개변수 타입을 튜플로 가져옵니다.
type Params =
Parameters<
typeof fn
>;`Awaited<T>`
Promise의 최종 결과 타입을 가져옵니다.
type Result =
Awaited<
Promise<string>
>;결과:
string67. 유틸리티 타입 한눈에 보기
| 유틸리티 타입 | 역할 |
|---|---|
| `Partial<T>` | 모든 속성을 선택적으로 |
| `Required<T>` | 모든 속성을 필수로 |
| `Readonly<T>` | 모든 속성을 읽기 전용으로 |
| `Pick<T, K>` | 필요한 객체 속성만 선택 |
| `Omit<T, K>` | 지정한 객체 속성 제외 |
| `Record<K, V>` | 키 집합과 값 타입 매핑 |
| `Exclude<T, U>` | 유니언에서 타입 제외 |
| `Extract<T, U>` | 유니언에서 타입 추출 |
| `NonNullable<T>` | `null`, `undefined` 제거 |
| `ReturnType<T>` | 함수 반환 타입 추출 |
| `Parameters<T>` | 함수 매개변수 타입 추출 |
| `ConstructorParameters<T>` | 생성자 매개변수 타입 추출 |
| `InstanceType<T>` | 클래스 인스턴스 타입 추출 |
| `Awaited<T>` | Promise 결과 타입 추출 |
이 표를 외우는 것보다 중요한 것은 질문을 던지는 것입니다.
“나는 지금 기존 타입에서 무엇을 바꾸고 싶은가?”
그 질문에 답하면 사용할 공구가 보이기 시작합니다.
68. 마무리
지금까지 TypeScript 타입을 만들 때 우리는 종종 새로운 타입을 직접 작성했습니다.
interface UpdateUser {
name?: string;
email?: string;
}하지만 기존 타입이 있다면 굳이 다시 만들 필요가 없는 경우가 많습니다.
type UpdateUser =
Partial<
Pick<
User,
"name"
| "email"
>
>;목록 화면에서는 필요한 속성만 골라냅니다.
type UserListItem =
  Pick<
    User,
    "id" | "name"
>;외부 응답에서는 민감한 속성을 제외합니다.
type PublicUser =
  Omit<
    User,
    "password"
>;상태 유니언에서는 필요 없는 경우를 제거합니다.
type ActiveStatus =
Exclude<
Status,
"idle"
>;`null`과 `undefined`를 제거할 수도 있습니다.
type SafeName =
NonNullable<Name>;함수에서도 타입을 다시 적을 필요가 없습니다.
type Params =
Parameters<
typeof sendEmail
>;type Result =
ReturnType<
typeof sendEmail
>;이번 편의 핵심은 다음 한 문장입니다.
새 타입이 필요하다고 해서 항상 처음부터 새로 작성할 필요는 없다. 기존 타입을 변환하고 재사용하자.
좋은 TypeScript 코드는 타입이 많다고 좋은 것이 아닙니다.
같은 정보를 복사하지 않고 하나의 원본 타입에서 필요한 타입들이 자연스럽게 파생되는 구조가 좋습니다.
User
├─ CreateUserInput
├─ UpdateUserInput
├─ PublicUser
├─ UserListItem
└─ ReadonlyUser원본 설계도 한 장에서 목적에 맞는 도면을 뽑아 쓰는 것입니다.
TypeScript의 유틸리티 타입은 개발자가 매번 톱질하고 용접하지 않아도 되도록 준비된 공구입니다.
이미 드라이버가 있는데 젓가락으로 나사를 돌릴 필요는 없습니다. 🥢🔩
69. PART 3 마무리
이번 편으로 PART 3 객체와 사용자 정의 타입을 마무리합니다.
우리는 단순한 객체에서 출발했습니다.
const user = {
id: 1,
name: "김타입",
};객체 구조에 이름을 붙였습니다.
type User = {
id: number;
name: string;
};`interface`도 배웠습니다.
interface User {
id: number;
name: string;
}동적인 키도 다뤘습니다.
type ScoreMap =
Record<
string,
number
>;객체의 키를 타입으로 꺼냈습니다.
type UserKey =
keyof User;값에서 타입을 만들었습니다.
type Config =
typeof config;객체 타입에서 원하는 값 타입도 꺼냈습니다.
type UserName =
User["name"];타입 전체를 변환하기 시작했습니다.
type OptionalUser =
Partial<User>;이제 TypeScript가 단순히 변수 옆에 `string`, `number`를 붙이는 언어가 아니라는 것이 조금씩 보이기 시작합니다.
타입 자체를 조합하고 변환할 수 있는 언어입니다.
그리고 다음 PART에서는 여기서 완전히 다른 능력을 만나게 됩니다.
TypeScript가 조건문을 보고 타입을 스스로 좁히기 시작합니다.
70. 다음 편 예고
다음 함수를 살펴보겠습니다.
function printValue(
value:
string | number
): void {
console.log(
value.toUpperCase()
);
}오류가 발생합니다.
왜냐하면 `value`가 숫자일 수도 있기 때문입니다.
value:
string | number그런데 조건문을 추가하면 어떻게 될까요?
function printValue(
value:
string | number
): void {
if (
typeof value ===
"string"
) {
console.log(
value.toUpperCase()
);
}
}조건문 안에서는 TypeScript가 `value`를 `string`으로 판단합니다.
조건문 밖
string | number
typeof 검사
↓
조건문 안
stringTypeScript가 코드의 흐름을 읽고 타입을 스스로 좁힌 것입니다.
이를 타입 좁히기(Type Narrowing)라고 합니다.
문자열과 숫자뿐만이 아닙니다.
if (
value !== null
) {
// null 제거
}if (
"permissions"
in user
) {
// Admin 타입으로 좁히기
}if (
error
instanceof Error
) {
// Error 타입으로 좁히기
}심지어 직접 만든 함수로도 타입을 좁힐 수 있습니다.
function isUser(
value: unknown
): value is User {
// ...
}이제 TypeScript는 설계도를 만드는 단계에서 한 걸음 더 나아갑니다.
실행 흐름을 추적하면서 현재 값이 어떤 타입인지 추리하기 시작합니다. 🔍
다음 이야기
[TypeScript 완전정복 #18] 조건문을 지나면 타입이 달라진다 | 타입 좁히기와 typeof 완벽 이해하기
- 타입 좁히기란 무엇일까요?
- 유니언 타입을 왜 바로 사용할 수 없을까요?
- `typeof`로 타입을 어떻게 좁힐까요?
- `string`, `number`, `boolean`은 어떻게 구분할까요?
- `null`은 왜 `typeof`만으로 확인하면 위험할까요?
- 참·거짓 검사를 이용한 좁히기는 무엇일까요?
- `===` 비교로 리터럴 타입을 좁힐 수 있을까요?
- 조건문을 빠져나가면 타입은 어떻게 달라질까요?
- `return`을 이용한 타입 좁히기는 어떻게 동작할까요?
- 제어 흐름 분석은 무엇일까요?
- TypeScript는 어떻게 코드의 흐름을 따라 타입을 추론할까요?
다음 편부터 PART 4 타입 좁히기가 시작됩니다.
지금까지 우리가 TypeScript에게 설계도를 건네줬다면, 다음부터는 TypeScript가 탐정 모자를 쓰고 코드 속 단서를 직접 추적하기 시작합니다. 🕵️♂️